EEK’s Electric Feet
Back-up 3 or 4 years, I had an idea to fit an electric starter on my 1974 850 Commando but I wanted a simple system, not as per the original complicated Norton design.
After a lot of research on the internet, I found a setup that was similar to an idea I had been nurturing since the 80’s, comprising a ring gear and a Bendix style starter motor, without all the additional gubbins that goes with the standard system or similar ones currently available on the market; I established contact with a chap in the United States (QPD): Who used a Bendix system, after a number of phone calls and discussions on the design, I decided to go ahead and ordered the set-up.
After some considerable time – a year, a fair bit of money passed hands, & it eventually arrived: I was not a happy bunny, the kit supplied comprised a secondhand starter motor, not new as suggested, a used engine pulley and a poorly engineered clutch drum and ring gear (over 2mm out of centre), some clutch plates and a belt, no outrigger and no instructions of how to fit the set-up, at this point I almost gave up on the whole idea of an electric starter motor
After some tears and feeling rather down about the whole idea, I contacted Fred at Old Britts in the US, to talk about my idea and he couldn’t have been more helpful, Fred supplied me with some unmachined outriggers and all the CNC info and drawings of how to set everything up, so we were now back on-stream.
The whole project took me about 3 months pretty much full-time to finish: I had to remove the lovely aluminium gearbox cradle that I made many years ago and replace it with a Mk 3 version, to fit everything where it needed to be. After a lot of modifying and still more modifying (& yet more), it finally came together and after a couple of minor teething problems, so far, so good – everything is working well.
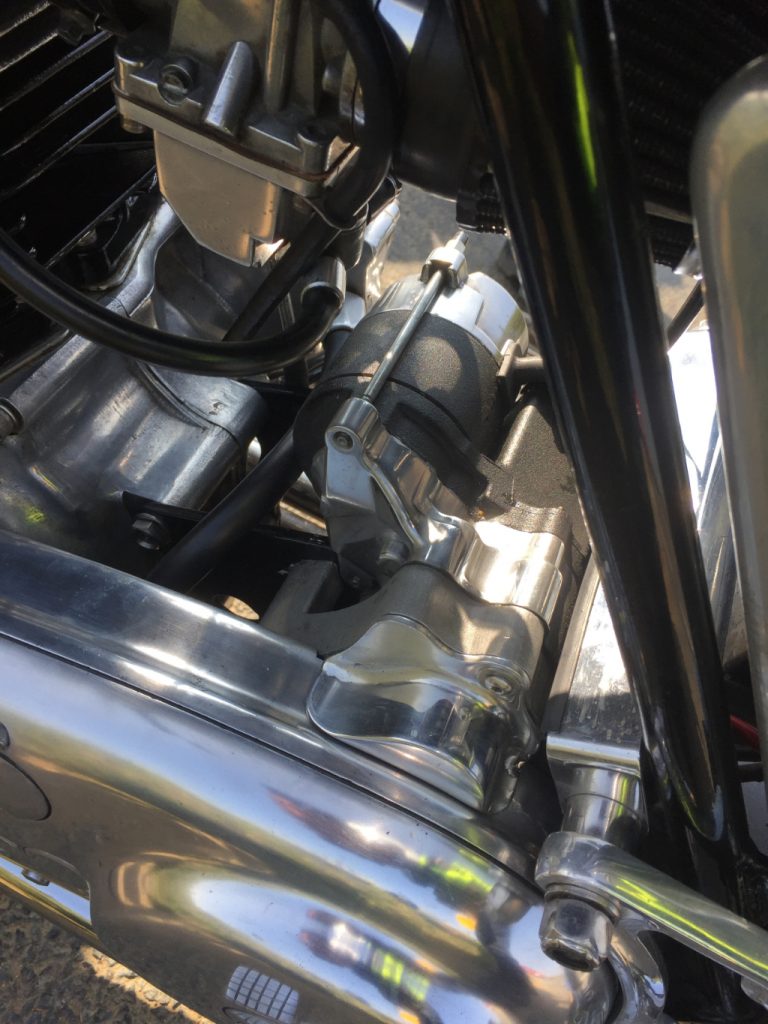
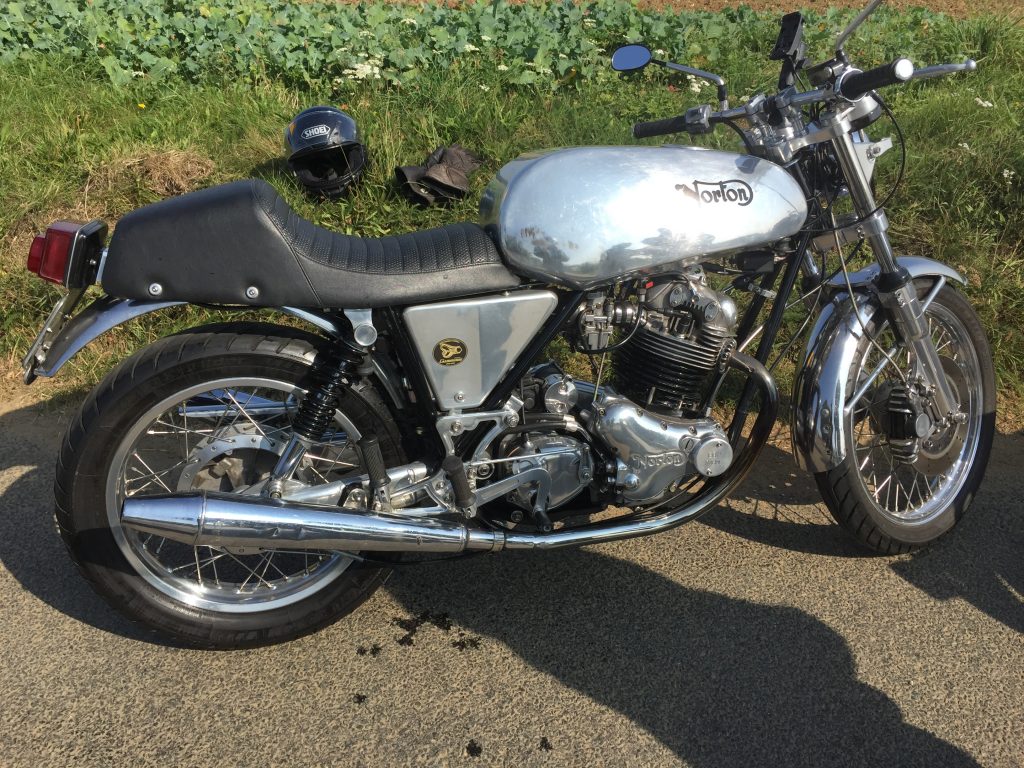
And then came Covid19 ! After a few weeks of lockdown, extreme boredom set in – so I decided to make another electric ‘foot’ for Theresa’s 1959 ’99’ Dominator.
Now the fun starts, a much smaller space to fit everything into…firstly I made a number of sets of engine plates and outriggers from MDF, and played around with these until the starter, clutch and gearbox fitted together, and the belt was set at the correct tension: after a number of prototypes and trialling different belt lengths, this part of the project was sorted, I then set to manufacturing the finished engine plates and outrigger, from high spec. alloy, and had the whole lot gloss black powder-coated.
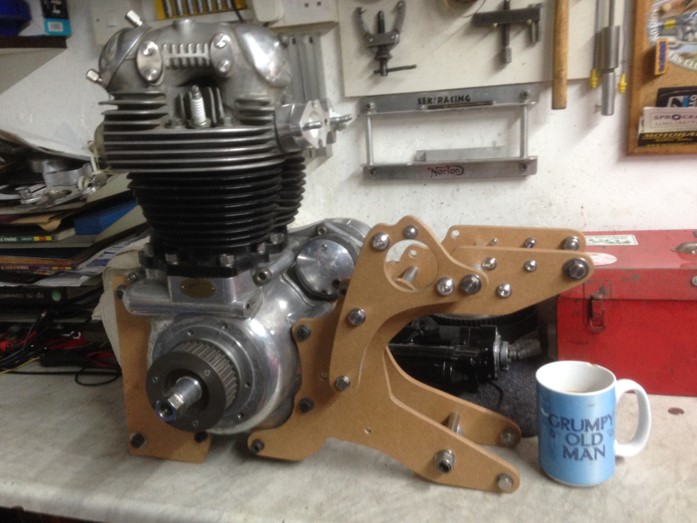
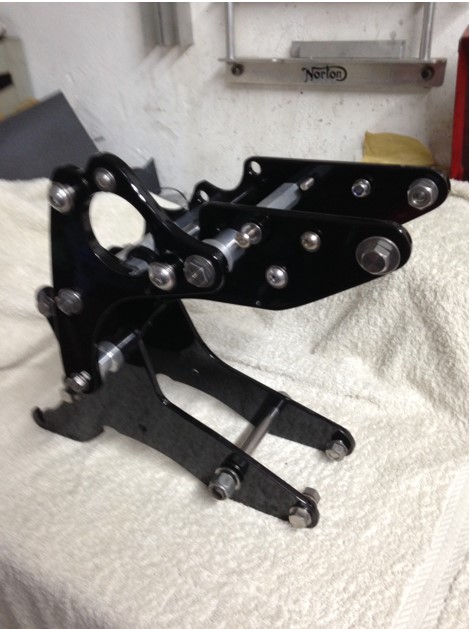
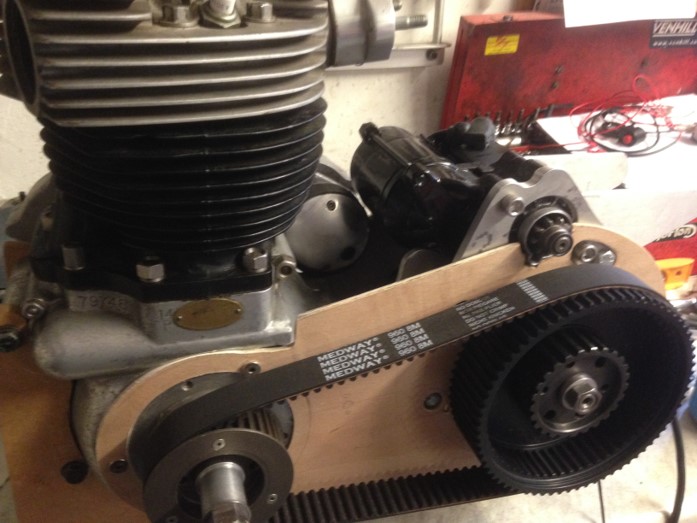
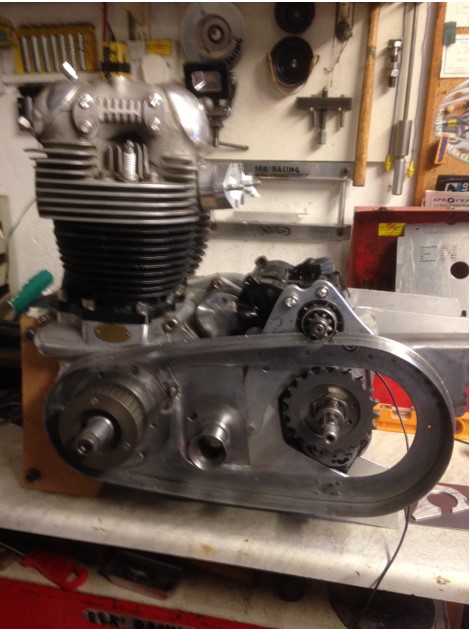
The next step was to set-up the ring gear: after designing and drawing up what I needed, I took the design to local engineering company for them to spark eroded rather than laser-cut the gears: expensive but a fantastic job and far more accurate.
The price of the type of steel I would have preferred to use for the ring gears (in small batches) was so restrictive it wasn’t an option at this time. Stuart from Anglian Engineering suggested some alternatives that had similar properties when heat-treated, so that’s what I went for: their expertise is second to none on all things engineering, from my experience.
Next round: setting up the primary cover: this proved to be a bit of a pain, I wanted to keep the standard set-up and cut down on too many mods to keep the original looks. As you can imagine this presented yet another set of problems: firstly I had to cut out holes in the inner cover and create a recess for the starter pinion, and accommodate the bolts for the starter and outrigger, not such a big problem, but a lot of checking, filing, checking, filing etc – next was fitting the outer cover.
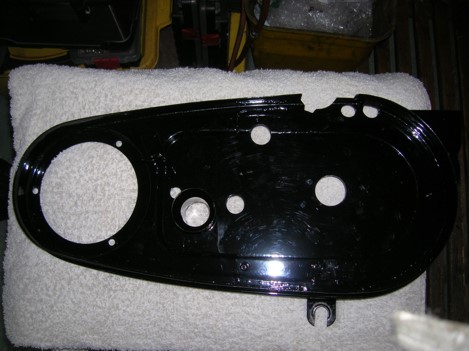
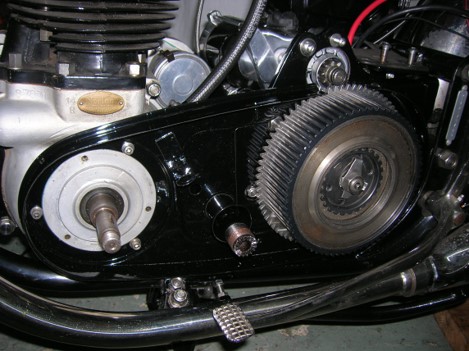
Because the gearbox has moved forward an inch or so, the clutch was now rubbing the outer cover, so I extended the foot-rest hanger and made spacers to bring the cover out about a 1/4″ from standard and now everything cleared, yippee!
Finally on the primary side of things, I had to make a little cover over the starter pinion, with the help of our friend Bob with his welding expertise.
The final part of the project was fitting the oil tank and battery-box: fortunately the oil tank fitted with only a small mod, achieved with a rubber hammer and a couple of spacers, also I had to make a different return oil banjo so the pipes missed the starter motor. However I had to cut and shut the battery-box so it fitted over the starter and make a new mounting platform, but now at last, everything fitted OK, the only thing left to do was the wiring and the first pressing of the shiny starter button – success !
While the bike was stripped, I fitted a sensible extra-long, stronger side stand, Theresa had asked me for this for years: A significant improvement over the standard item – and a nice touch to a finished project.
So far all is working well and Theresa is pleased with the outcome, time will tell, when we are allowed out & about again, making-up for lost time riding our
‘Electric starter’ Nortons’ !
© Adrian Dedman – 28th March 2021